The rocket shell and its rarities
Shells are at the core of Hermit’s gameplay, and how satisfying they are to use and how nice it feels to have different versions of them will determine how the player perceives the game. Today I want to address one of our earliest shell already present in the prototype, the Rocket shell.
The shells and their stats
Each shell has three different properties (stats) which will determine how many times a shell can be used to either attack, or defend.

The three stats are: “Durability”, “Cost of attack” and “Attack Strength”. The durability points are shared between offense and defense, meaning that burrowing the Hermit to defend against incoming damage costs durability, in the same way as hitting an enemy. The cost of defending is always the strength of the enemy, while attacking can cost a different amount depending on the shell.
An example: my rocket has three durability points, its cost of attack is two, and it inflicts one damage when hitting an enemy.
I pick my rocket up with its three durability points. An enemy is on top of me, I burrow and get hit for one durability point, remaining two. I then throw my rocket at the enemy and hit him, which costs two points and inflicts one damage to the enemy. My rocket is now destroyed because the durability is down to zero.
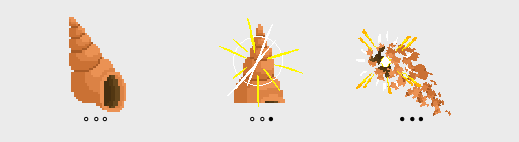
Shell rarities
Now that we have this system down, it is easy to devise a way to allow the player to unlock more advanced shells.

We decided to implement, for each shell, three rarities: common, rare and epic (yeah pretty basic names, might change 😅). The common level is simply put the shell that you get once you unlock the shell. You then get two different possibilities of rare shells: either an ability or a stats upgrade. While the stats upgrade “only” changes the different values discussed above, the ability upgrade changes something in the behavior of the shell itself. The rare shell then combines the rare ability and stats.
Obviously there will be a limit to the number of epic, rare and common shells you will be able to carry into a fight. More on that in a next blog post.
The Rocket’s ability upgrade

Given the rocket’s ballistic nature, a logical though process for us has been to add an aim help to the rocket for the ability upgrade.
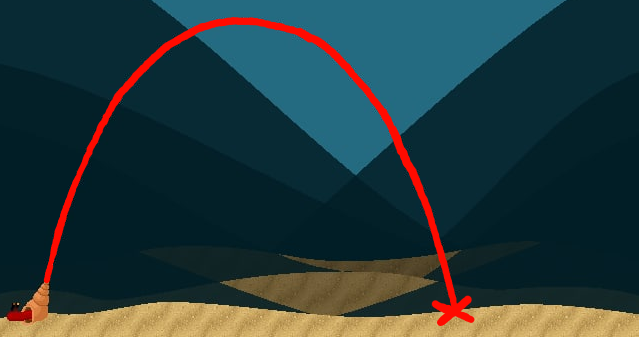
This shows the player the trajectory ahead of time such that the landing point is know, and better timing of the launch is possible.
Implementation
This section will be a bit technical, so if you’re not interested, feel free to head over to the Result😊.
The first order in implementing this ballistic trajectory was to create the curve. To do this I decided to use Unity’s new Sprite Shape Renderer Package, which was mostly developed to create more organic levels, but which is actually the perfect tool for this job. The package allows defining points, connected by splines, along which a texture can be drawn. At its core, the curve is supposed to be closed and filled, but there is an option to keep the curve open and only render the texture along its path, which is what we need here.
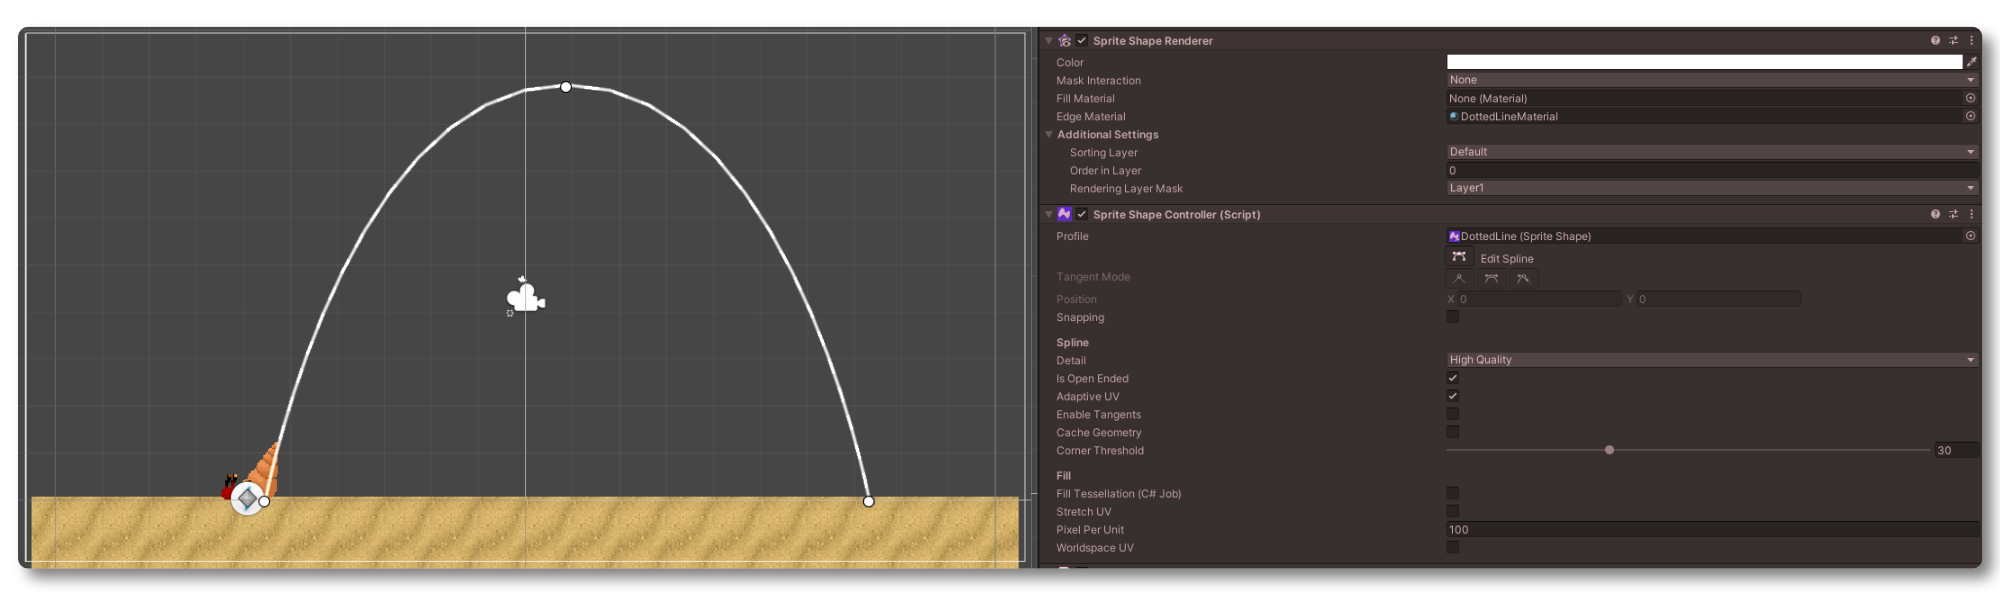
Adding a shape renderer to the scene is really easy: create a new empty object and add a sprite shape renderer as well as a sprite shape controller to it.
We can then set the shape to be “Open Ended”, and define three points, each with “Tangent Mode” set to “Continuous Mirrored”.
The three points define the trajectory of the shell.
The field “Profile” defines what will be drawn. We here need to create a new “Sprite Shape” asset and populate it with the desired data.
![]()
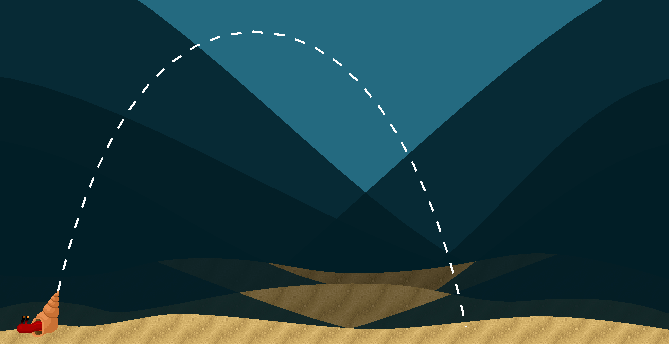
You get a lot of options how to set up your profile, with rules depending on values of inclination, border, etc. but in our case we are only interested in adding one sprite, a white dashed line (two parts: one full, one empty).
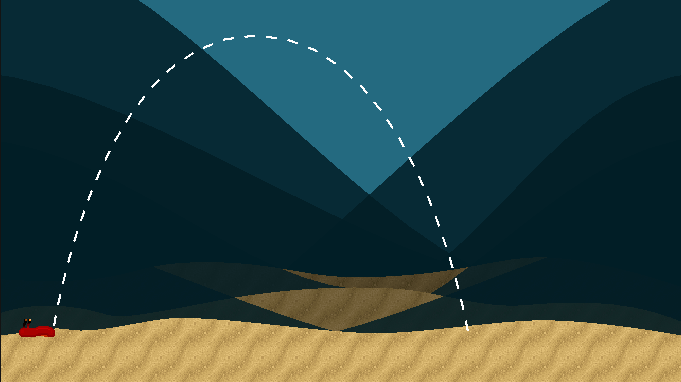
Once assigned to the shape renderer, we get a dotted line following the path defined above
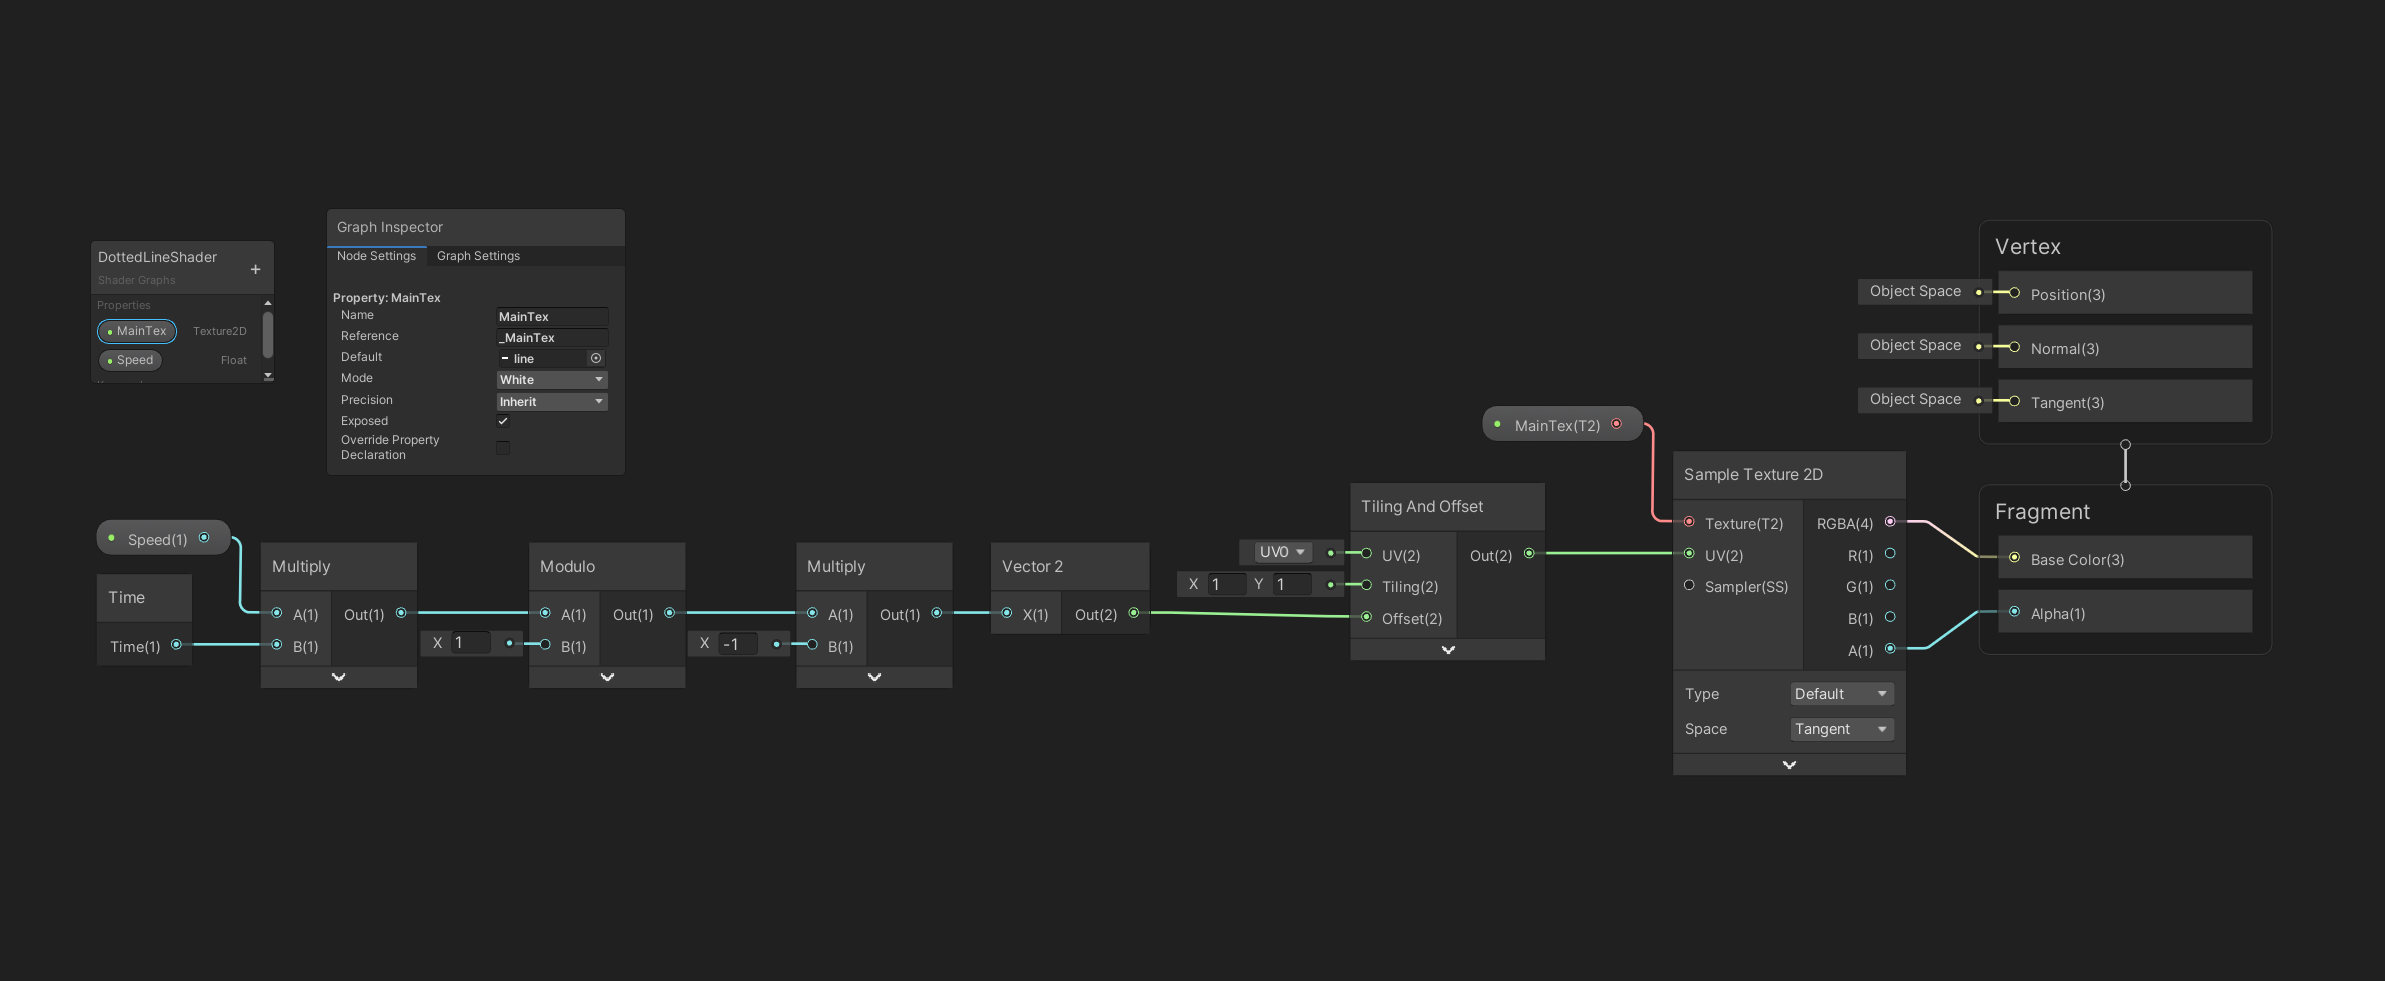
Now to add a bit of life to this rocket, the dashed line should move towards the target. To implement this I decided to crate a little shader in Unity’s Shader Graph which would shift the texture in time, giving the impression that the line moves towards the target.
Now, shaders are not my strengths, but the node based tool in shader graph is really nice, and I managed to wrap my head around it.
This shader is implemented with the new Universal Render Pipeline.
First, create a new shader asset: Shader > Universal Render Pipeline > Sprite Unlit Shader Graph.
The next thing to understand is that to retrieve the texture used by the renderer, you need to define a new Texture2D field, with “Reference” set to _MainTex.
After that the shader is pretty straight forward (although I don’t know about performance 😅):
- The Time node just returns the time.
- We then multiply the time by the speed at which we want the time to flow.
- We take the modulo 1 of this value to not have eccessively large values (not sure this step is required).
- We then multiply the value by -1 to reverse the flow, and then transform this value into a vector 2.
- The value is then given to a “Tiling and Offset” node, which allows to offset the position of the texture.
- Finally we feed the position and the main texture to the texture display (Sample Texture 2D node), and read the values to generate the colors in the master node (Fragment).
After generating a material from this shader (right-click on the shader > create material), we set the sprite shape renderer material to this newly created material and the results looks quite nice:

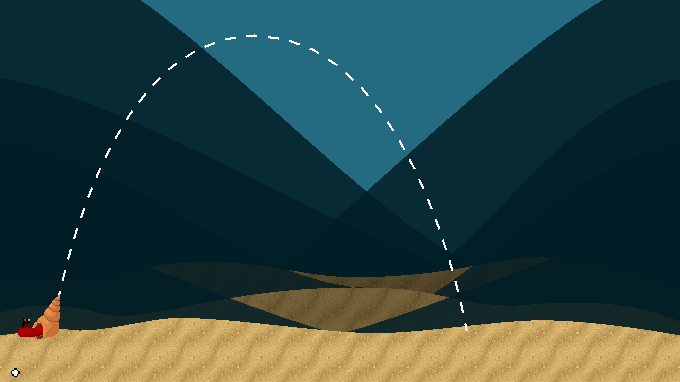
The problem now is that this curve is not ballistic, and if the Hermit jumps, or if the parameters of the rocket are changed, the line doesn’t reflect the trajectory.
To remedy this problem, we need to do some math!
Computing the rocket’s trajectory
Ballistics are Bachelor 1 physics, so lets see if I can remember how to do this 😅.
The rocket is subject to two forces: the initial throwing force (here actually a velocity), and the gravity.
In Unity, the rocket is launched by giving the rocket’s Rigidbody an initial velocity depending on the throwing angle:
rb.velocity = velocity * new Vector2(
                            Mathf.Cos(angle),
                            Mathf.Sin(angle)
                        ).normalized;
The cos and sin project the part of the velocity onto the x- and y-axis, to give it a direction.
We thus know the initial velocity of the rocket.
First year ballistics (and a guy called Newton I think), let us know that the sum of forces must be equal to the mass times the acceleration, if nothing else is considered:
 In our case, we are only interested in the acceleration, which only depends on the gravity:
 The velocity is the integral of the acceleration over time, and reads:
 which is where we find our initial condition of the rocket, the initial velocity. The speed at any given time, thus corresponds to the initial velocity of the rocket, altered by the acceleration, here the gravity.
As written above, the velocity is projected onto two axes:
which is where we find our initial condition of the rocket, the initial velocity. The speed at any given time, thus corresponds to the initial velocity of the rocket, altered by the acceleration, here the gravity.
As written above, the velocity is projected onto two axes:
 with theta the amplitude of the velocity, and alpha the angle.
What we are actually interested in is the position of the rocket in time, as we want to set the points along the trajectory for the curve. The position in time is, again, the integral of the velocity over time:
 with the initial position of the hermit as last term of the equation.
Now that have set the equations required to compute the points, lets see what we need in order to compute the position of the top point. We are looking for the position at the top, which depends on the time required to reach the top. What we do know, is that at the rocket is at the top when the acceleration has compensated the initial velocity uplift, and thus the vertical velocity equal to zero:
 We have just previously written the equation of velocity in time (equation 3), let’s thus rewrite it such that it corresponds to the conditions at the top:
 This gives us two lines of equations which both have to be fulfilled.
The bottom line only contains one unknown, the time! We thus use the second line to isolate the time:
This gives us two lines of equations which both have to be fulfilled.
The bottom line only contains one unknown, the time! We thus use the second line to isolate the time:

And the problem is solved!
Now that we have the time, we can easily plug it in equation 5 and get the position of the shell at the top of its trajectory:

Let’s see if this works:
Works like a charm!
The only thing left now is to compute the position when the rocket hits the ground, which will depend on the initial position of the hermit as well.
We are looking for the position of the rocket at the end of the trajectory, and thus the time required to reach this point. What we know is that at the end, the rocket will be on the ground at 0 elevation:

We can thus rewrite equation 5 to consider this:


With the last term of the equation the initial position of the hermit.
The first line of the equation system gives us what we want, but still contains two unknowns, the time and the position:

The second line of the equation only has the time as unknown, meaning we can go fish the time from this equation:
 This second order equation can be solved using the Quadratic formula:
 We know that we need the time to be positive, and give that the quantity inside the root will be bigger than the quantity outside, we only keep the positive sign.
By plugging the values of the initial velocity, we get this equation for the time:
We know that we need the time to be positive, and give that the quantity inside the root will be bigger than the quantity outside, we only keep the positive sign.
By plugging the values of the initial velocity, we get this equation for the time:
 and the final position:

The only thing left to do is to update the two points inside unity:
void Start() => GetComponent<SpriteShapeController>().spline
    .SetPosition(1, topPosition);
void Update() => GetComponent<SpriteShapeController>().spline
    .SetPosition(2, bottomPosition);
The top position is only computed once, at the start, while the bottom position is updated at each frame.
Let’s see if this works as expected:
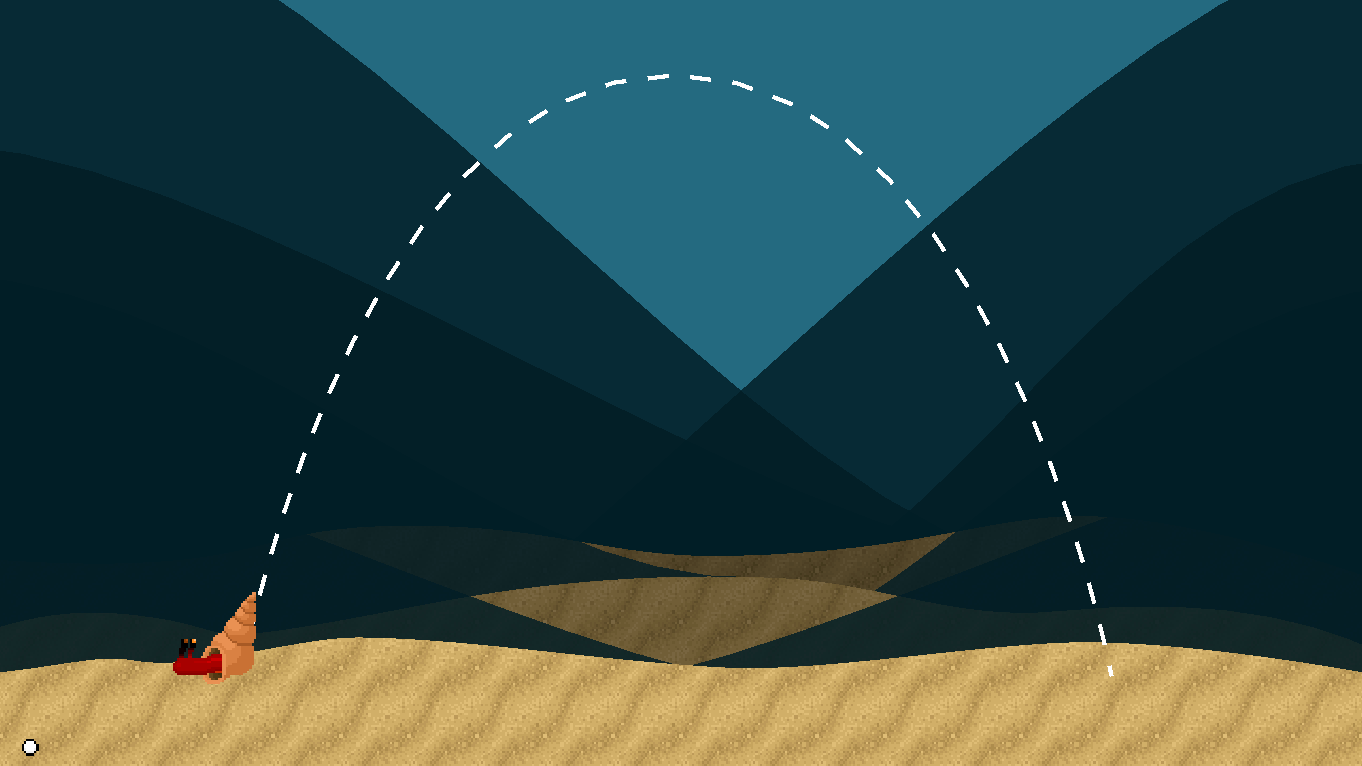
Looks like the line extends further when the hermit jumps, victory!
Result
Well, this was eventful. Now that everything is put together, the only thing left to do is enable and disable the shell on equip and unequip, and put it all together:

Works nicely in my opinion 😊.
Conclusion
Well that was a bit more technical than other posts, hope you still enjoyed it! Let us know if these kinds of topics are the kind of things you would like to read about.
In any case, thanks a lot for reading!
Read the latest articles:
Updating the bug reporting tool
Early Coffee Games at GDC 2022 in San Francisco!
Scroll Rect - automatic scroll with elements navigation
